Hardware Set Up
This guide walks you through assembling your OcuTrap R1 step by step, in three sections: Door, Handle, and POD. Follow each step carefully to ensure your OcuTrap functions correctly. When the hardware is done, continue to Adding a trap to your account for the app setup.
Prefer to watch? The full assembly video is below, and Video Assembly breaks it into per-section clips.
Unboxing and Initial Inspection
Carefully unpack your OcuTrap R1 and check that all components are included:
Cage
Parts Box
.png)
Examine each item for any visible damage. If anything is missing or appears damaged, halt installation and contact support@ocutrap.com with your Trap ID.
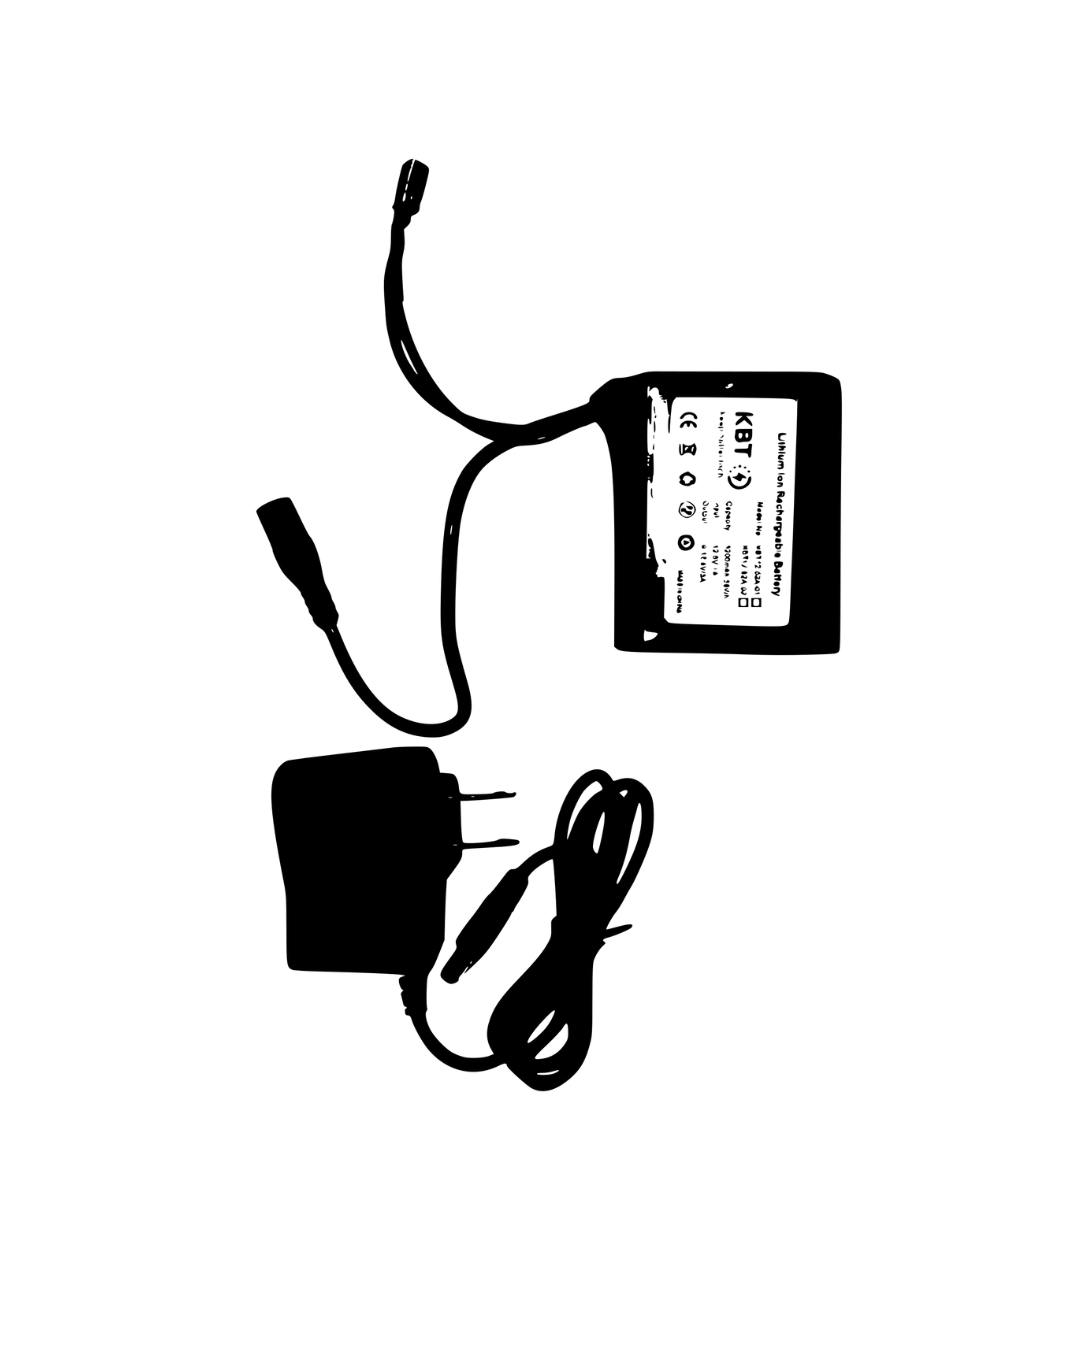
Charge the Battery
Fully charge the blue battery until the charger light is green, using the accompanying charger found in the small white box. A full charge takes about 5–6 hours — start it now so it's ready when assembly is done.
Section 1: Door Setup
Step 1: Components Needed for Setup
Before beginning, ensure you have the following parts for the door assembly:
Door
- 2x Brackets (top locking mechanism)
- 2x Black spacers
- 2x Black capped nuts
- 1x Metal door
- 1x 12” Rod
- 1x Nut Driver
- 1x Nut Assembly Tool (figure right)
Motor
- 1x Motor
- 2x Pins
- 2x Clevises
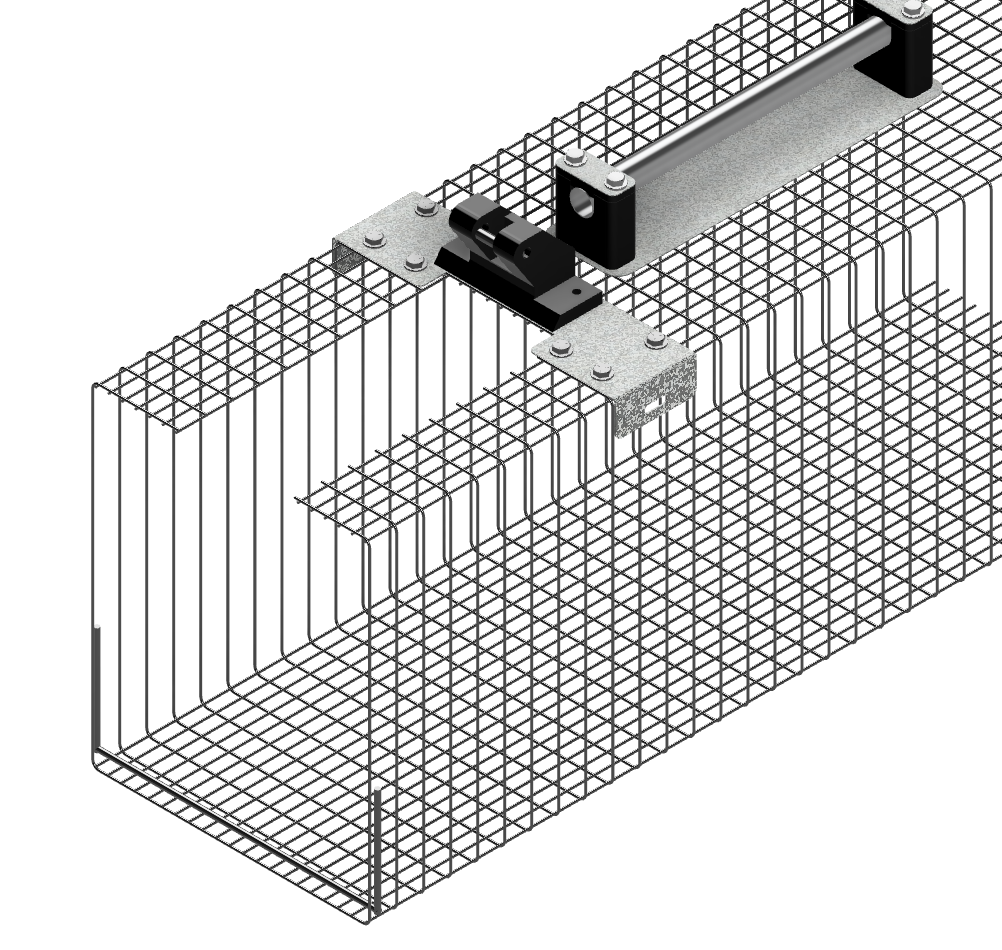
Step 2: Setup the Door Mechanism
- Align the metal door inside the trap.
- Thread the metal rod through the oval slot in the metal bracket attached to the top of the solid metal trap door.
- On each end of the rod:
- Place a black spacer.
- Secure it with the black capped nut on both sides
- Use the nut assembly tool and the nut driver on each end to tighten the nut until snug.
.png)
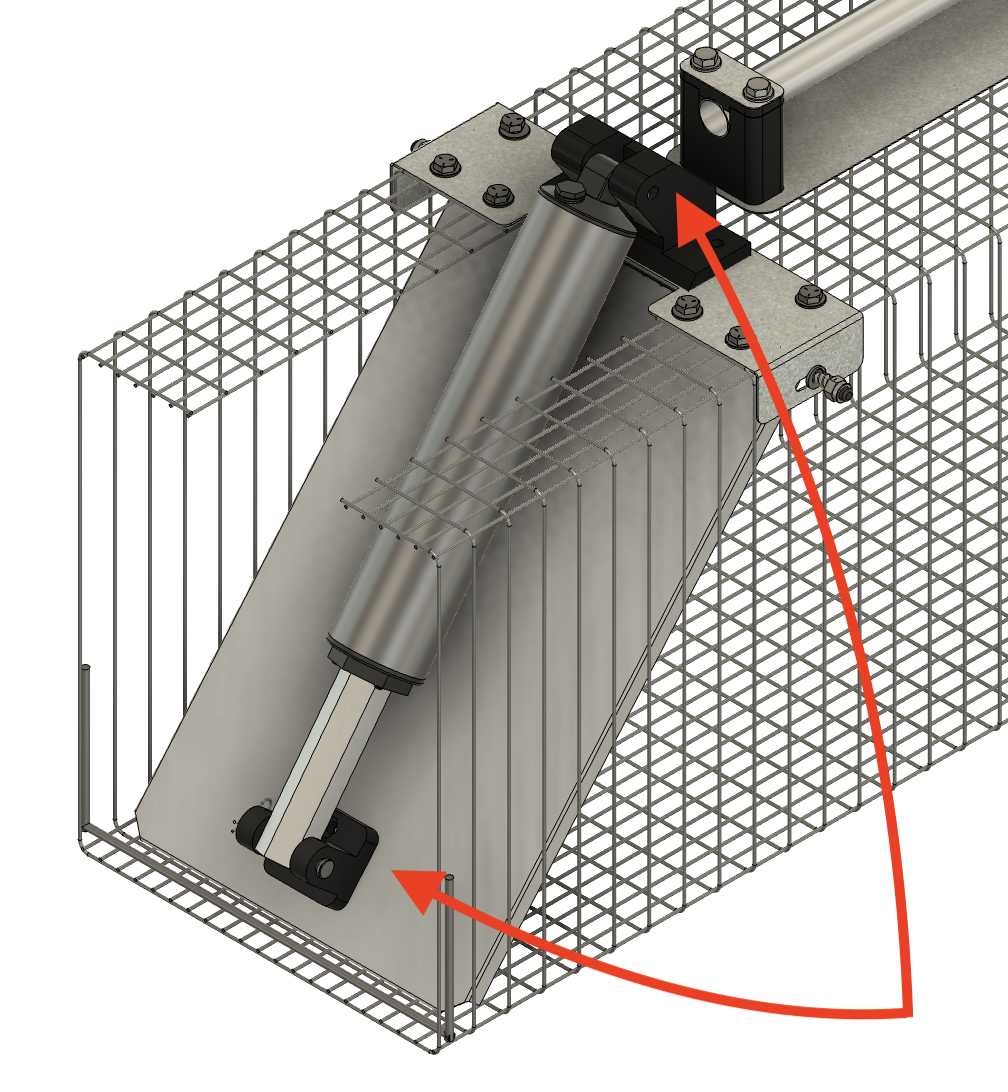
Step 3: Setup the Motor
- Install top bracket with washers and bolts. Tighten with nut driver.
- Use the pins and clevises to secure the motor to the door at both the top and bottom attachment points.
- Feed the cable through the metal handle.
- Verify that all components are securely fastened.
- Check that the door moves smoothly and is properly aligned.

Section 2: Handle Setup
Step 1: Gather Your Components
Before beginning, ensure you have the following parts for the handle setup:
| Quantity | Part |
|---|---|
| 4 | 3” bolt |
| 1 | Handle Guard |
| 1 | Tube |
| 4 | Washers |
| 2 | Top Handle Metal Bracket |
| 2 | Upper tube plastic spacer |
| 2 | Lower tube Plastic Handle Spacer |
| 2 | Internal Trap Bracket with Press-Fit Nut |
| 1 | Nut Driver |
.png)
Step 2: Screw in handle
- Center the handle guard on the trap.
- Insert the two top handle pieces into the holes in the handle guard.
- Slide the tube between the two handle guards and ensure it is centered.
- Place the bracket (with the press-fit nut) inside the trap and hand-tighten the bolts.
Do not fully tighten the bolts until the motor connector is fully through the tube
.png)
Top View
.png)
Inside trap view
Section 3: POD
Step 1: Mount the POD
- Slide the POD down the rails on the trap until it is in place.
- Attach the clip at the top to keep the POD in place.

Step 2: Connect the Wire to the POD
- Attach the motor’s wire to the POD using the locking screw connector, ensuring a secure connection.
- Use the top latch to secure the POD in place.
Fully tighten all the bolts (including the handle bolts you hand-tightened earlier). At this point, your hardware setup is complete.
If you have issues, see Common Issues.
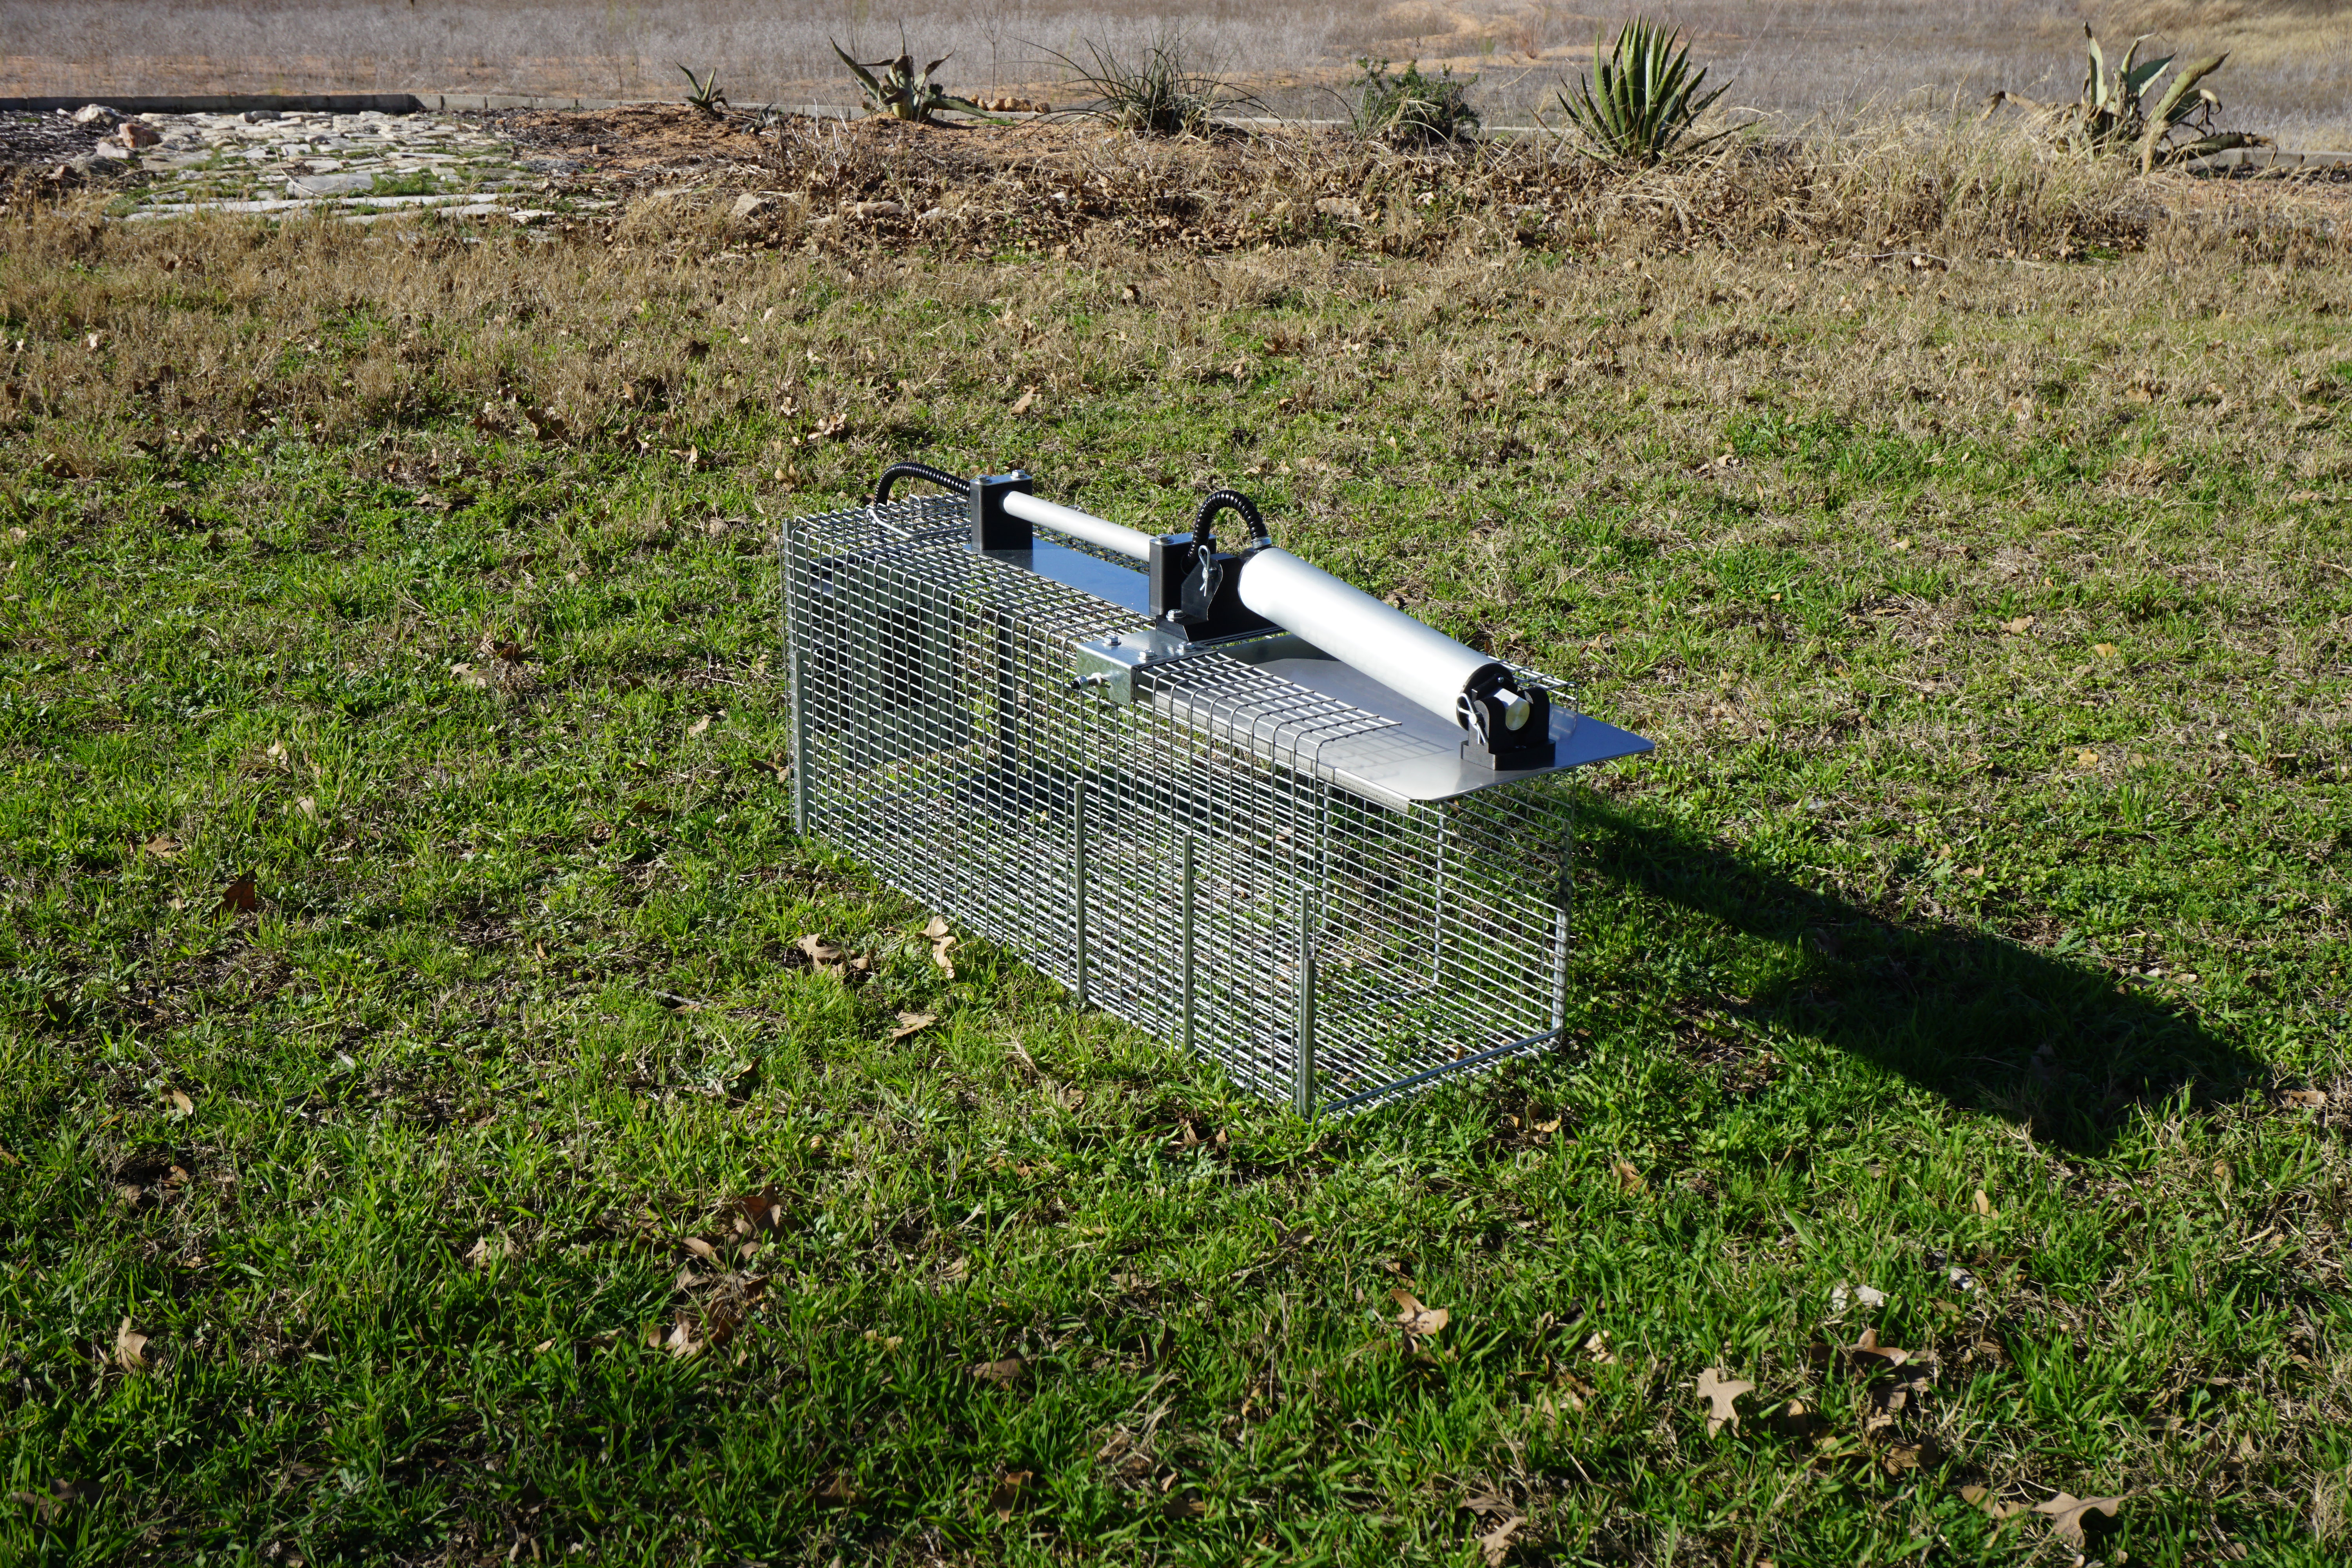
The OcuTrap hardware now set up!
Next: add the trap to your account — Adding a trap to your account. To learn what each part of the trap does, see Hardware Features.