
Adjusting the motor bracket (R1 only)
Adjust the R1 motor bracket toward the front opening to reduce the gap and improve catches.
On this page
Move the motor bracket toward the trap's front opening to reduce the gap and help improve catches.
Tools: two nut drivers that fit the mounting hardware.
Before starting: fully lower the door and unplug the motor.
1. Remove the black top motor bracket
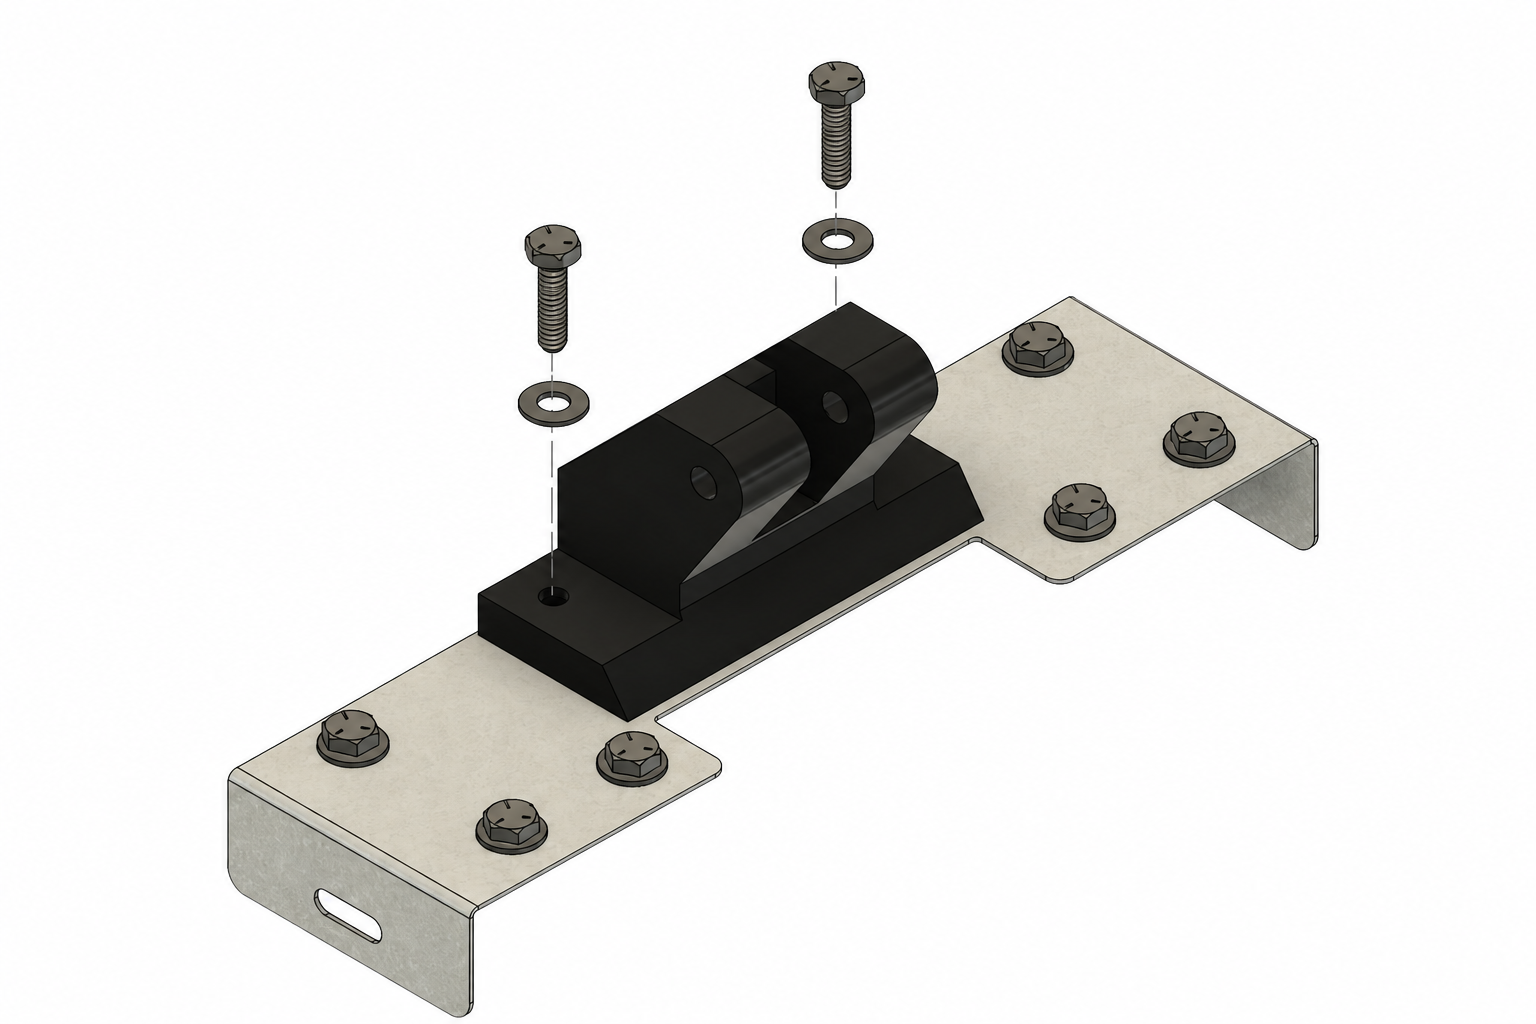
Support the motor and bracket. Remove the black bracket's two bolts and washers, then lift it off the metal plate. Save the hardware for reassembly. Leave both metal brackets on the cage.
2. Identify the metal brackets
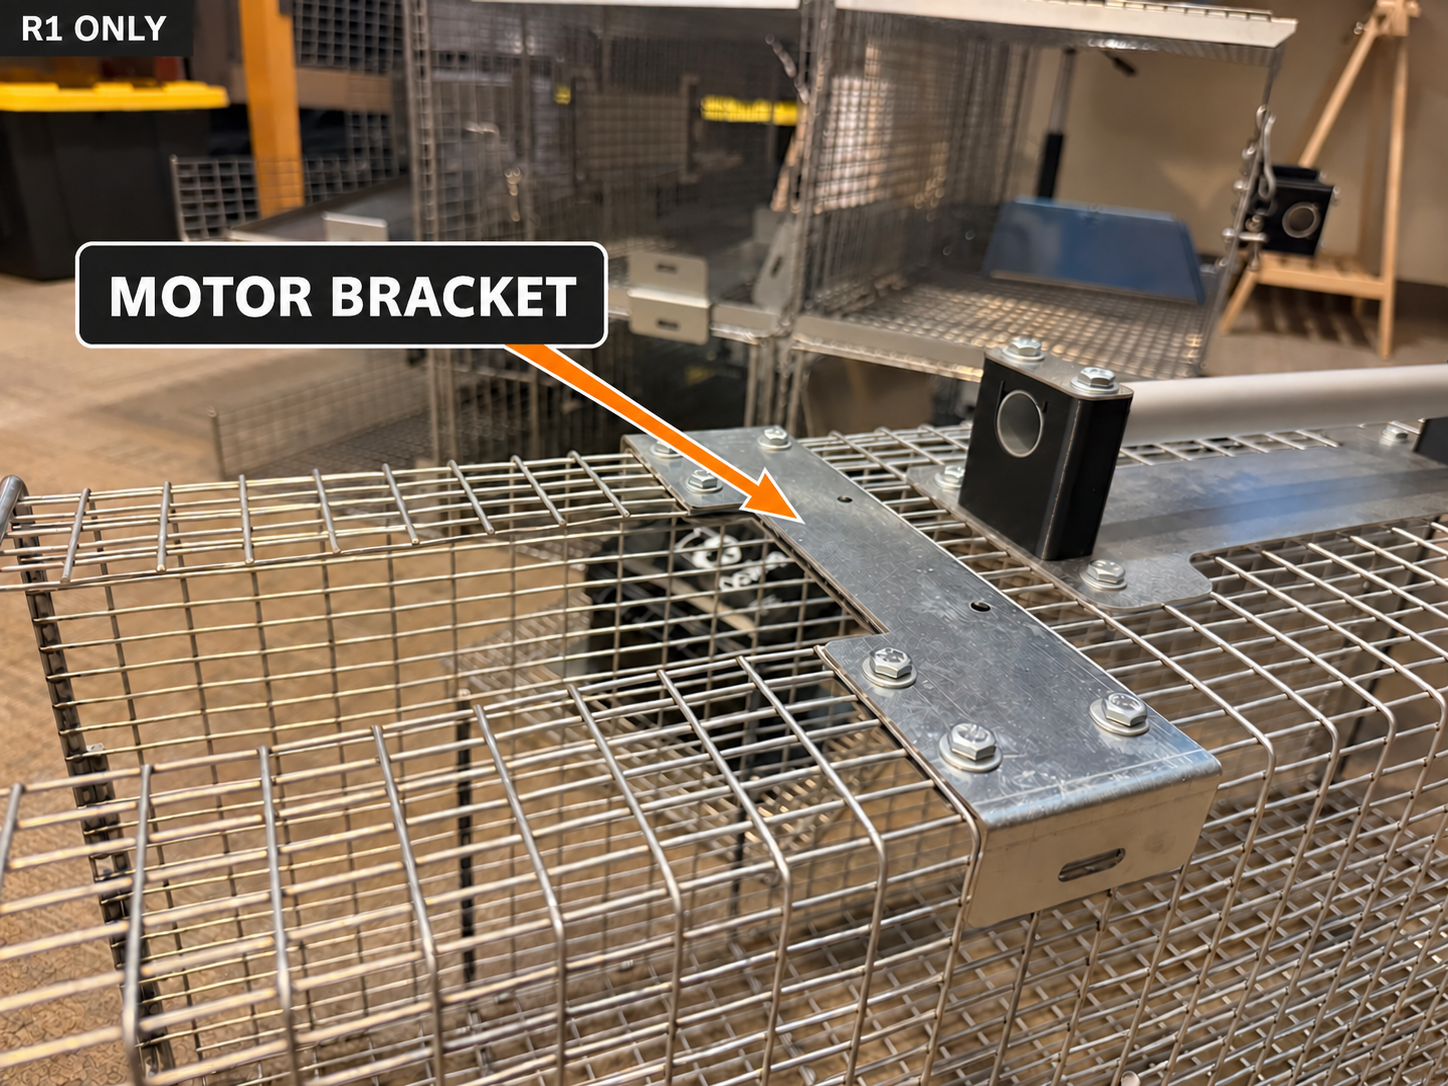
The assembly has a top metal bracket (shown below) and an inner metal bracket, secured by six bolts with nuts underneath.
The inner bracket's flat side sits on top of the cage; its two press-fit inserts protrude inside the trap. Maintain this orientation.
3. Loosen the six mounting nuts
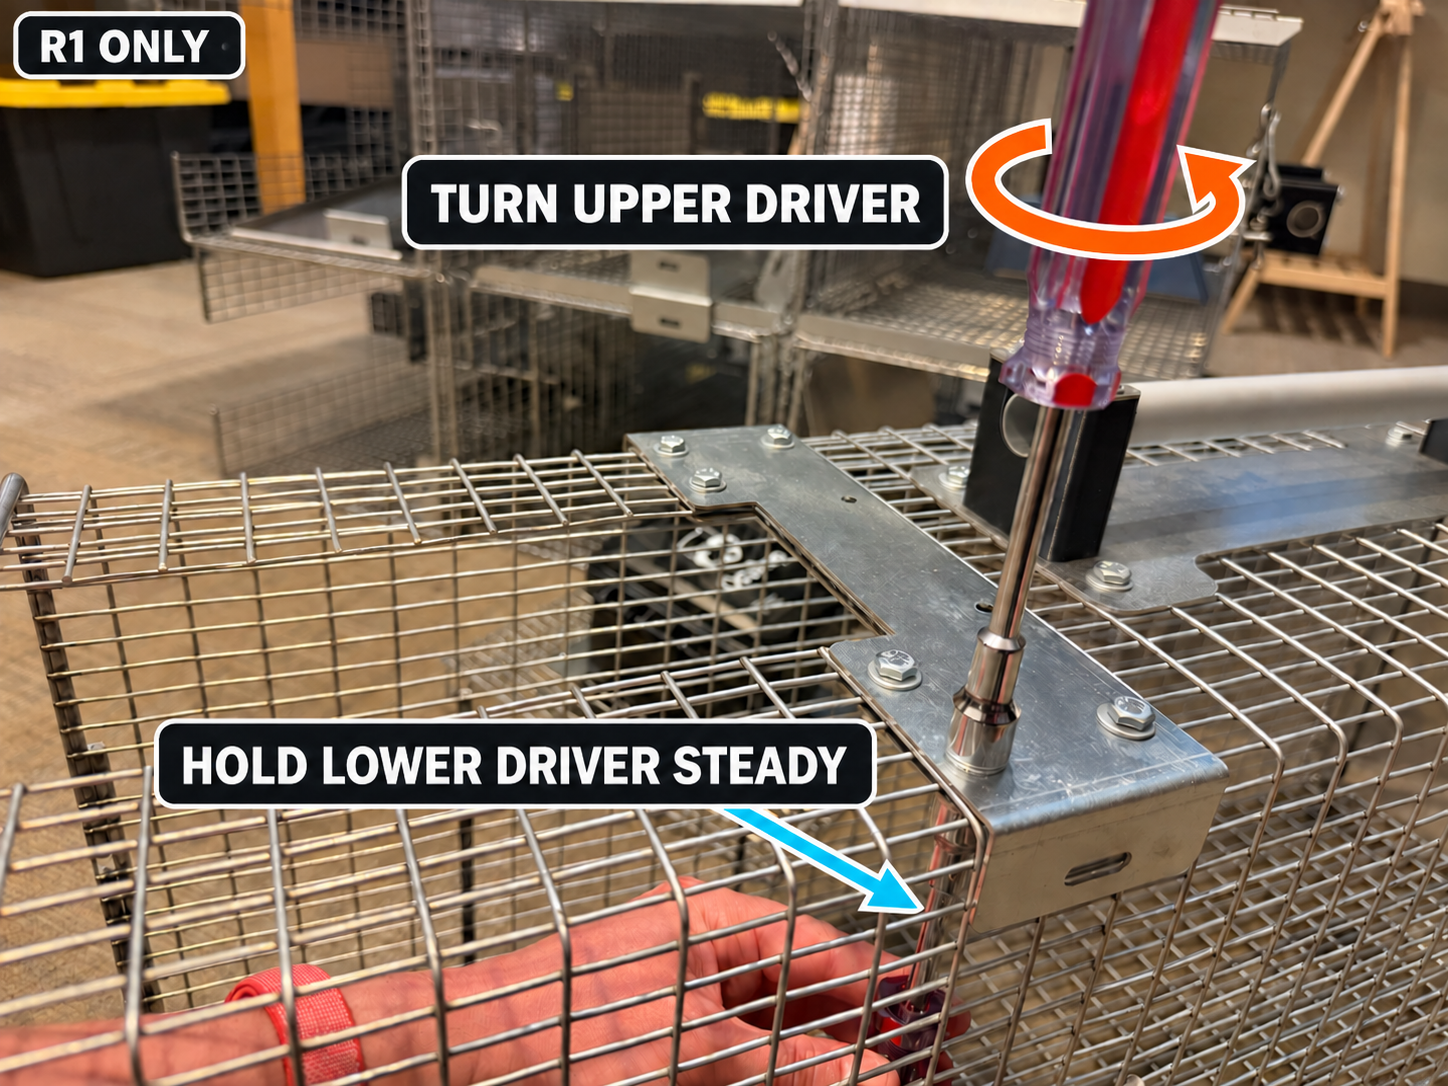
Fit one driver onto the nut underneath and the other onto the bolt head above. Hold the lower driver steady; turn the upper driver counterclockwise, viewed from above.
Repeat at all six bolts, loosening just enough for the assembly to slide. Keep the nuts and bolts installed.
4. Slide toward the front opening
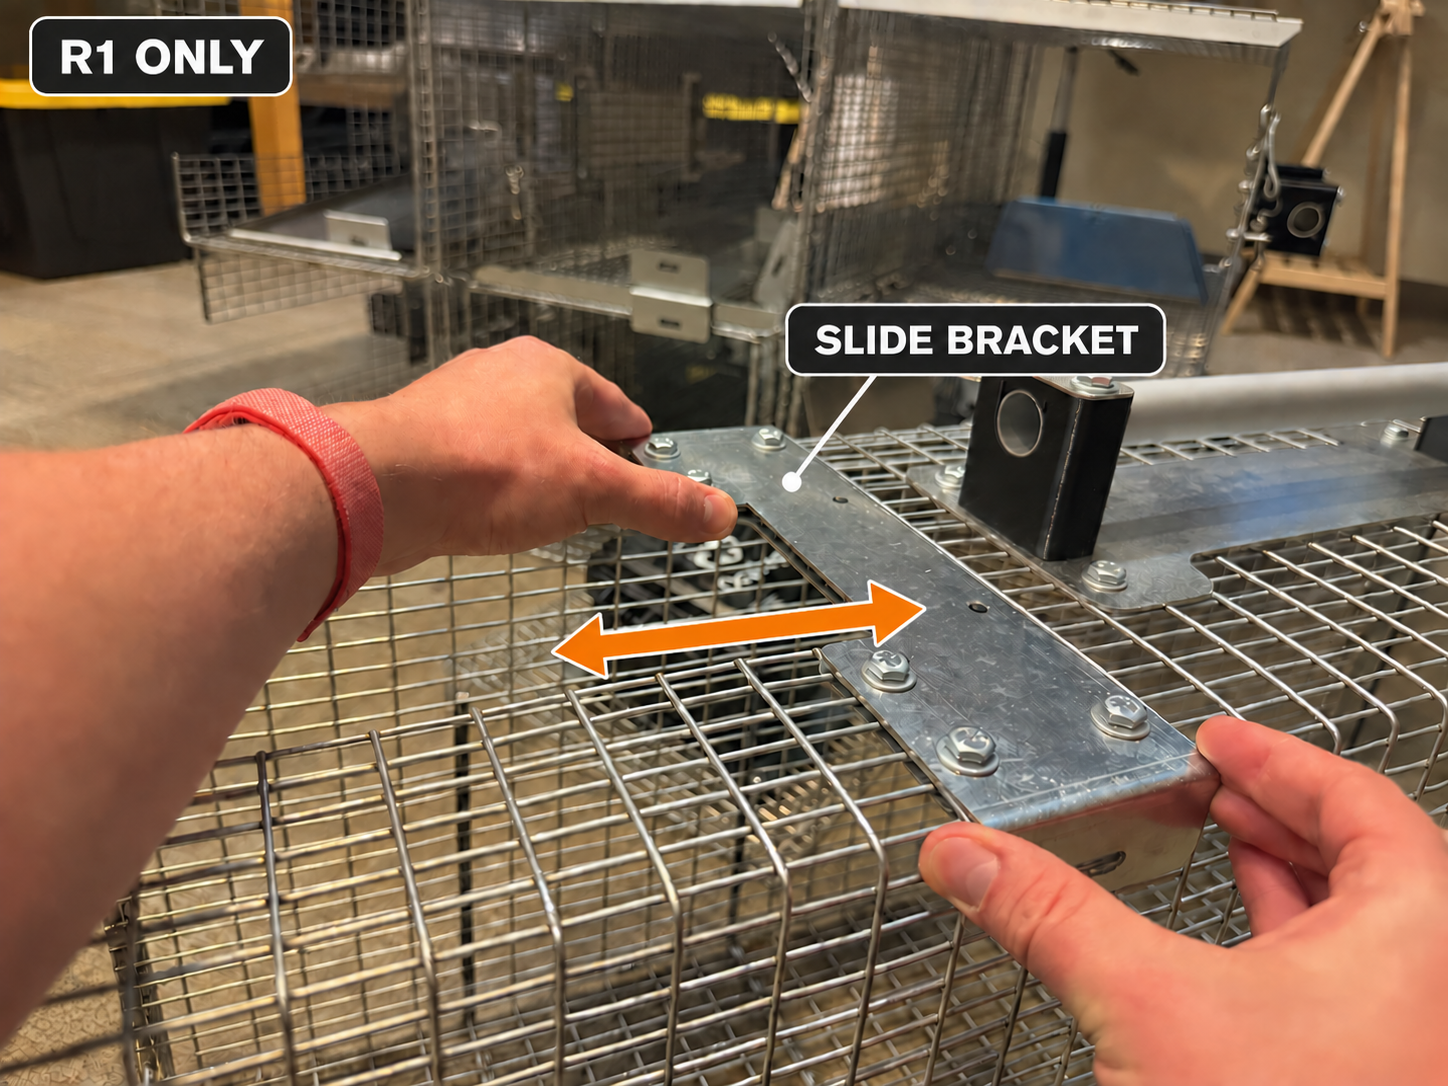
Hold both ends of the metal plate and slide it toward the front opening. Usually, only a small movement is needed.
5. Tighten all six bolts
Hold the plate in position. Hold the lower driver steady and turn the upper driver clockwise. Tighten all six bolts and check that the plate cannot slide.
6. Reinstall the black top motor bracket
Place the black bracket on the plate and securely reinstall its two bolts and washers. See R1 hardware setup if needed.
Clear your hands and tools, reconnect the motor, and check that the door opens and closes smoothly. It must sit behind and underneath the locking bar across its full width (see locking check).
Before readjusting, fully lower the door and unplug the motor. Contact support if it still will not close and lock correctly.