
Replacing the motor port connector
Replace the motor port connector on top of the R2 POD: power off, free the two motor wires, swap the connector and wire it back red left, black right.
On this page
Applies to OcuTrap R2
The motor port is the metal connector on top of the POD that the motor cable screws onto. Replace it if it is cracked, loose in its hole, or the motor still won't run after the Motor connector tightness check.
Tools: a Phillips screwdriver (a small one fits the terminal screws) and an adjustable wrench.
Parts: a replacement motor port connector from OcuTrap support, with its red and black wires attached.
Time: about 15 minutes.
Reading the photos
- Yellow ring: the part you work on in that step.
- Grey ring with a no-entry sign: the accessory port. Leave it alone.
- Red + and black −: where each wire color goes.
- Arrow icons: turn counterclockwise to loosen, clockwise to tighten.
Two ports, two terminal blocks, opposite wiring. The motor port's wires go in the left green terminal block: red in the left screw, black in the right. The accessory port uses the next block and is wired the other way round. Don't move its wires, and don't put the motor wires in its block.
1. Power off and unplug
Hold the Power button about 3 seconds until the LED goes solid red and the trap beeps down. Unscrew the motor cable from the top of the POD. Unplug the yellow battery connector.
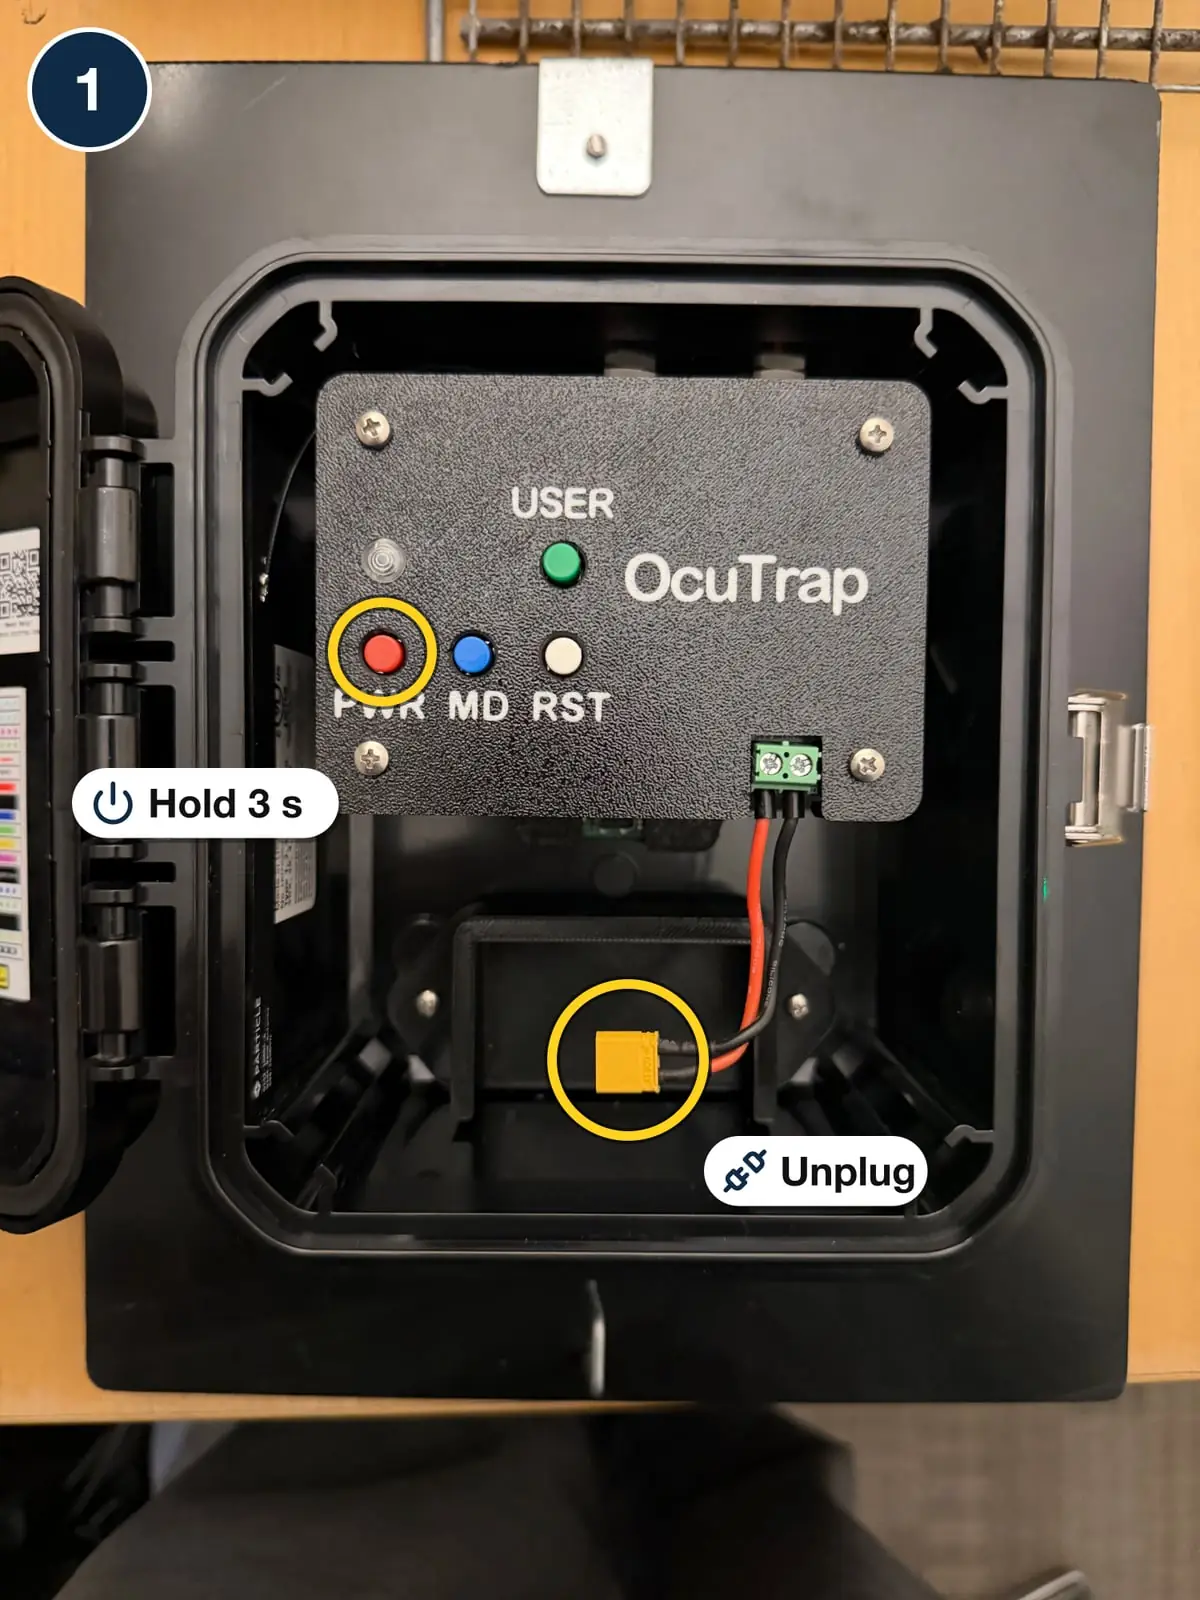
Hold PWR, then unplug the yellow battery connector
2. Remove the faceplate screws
Remove the four screws at the corners of the black faceplate. Keep them for reassembly.
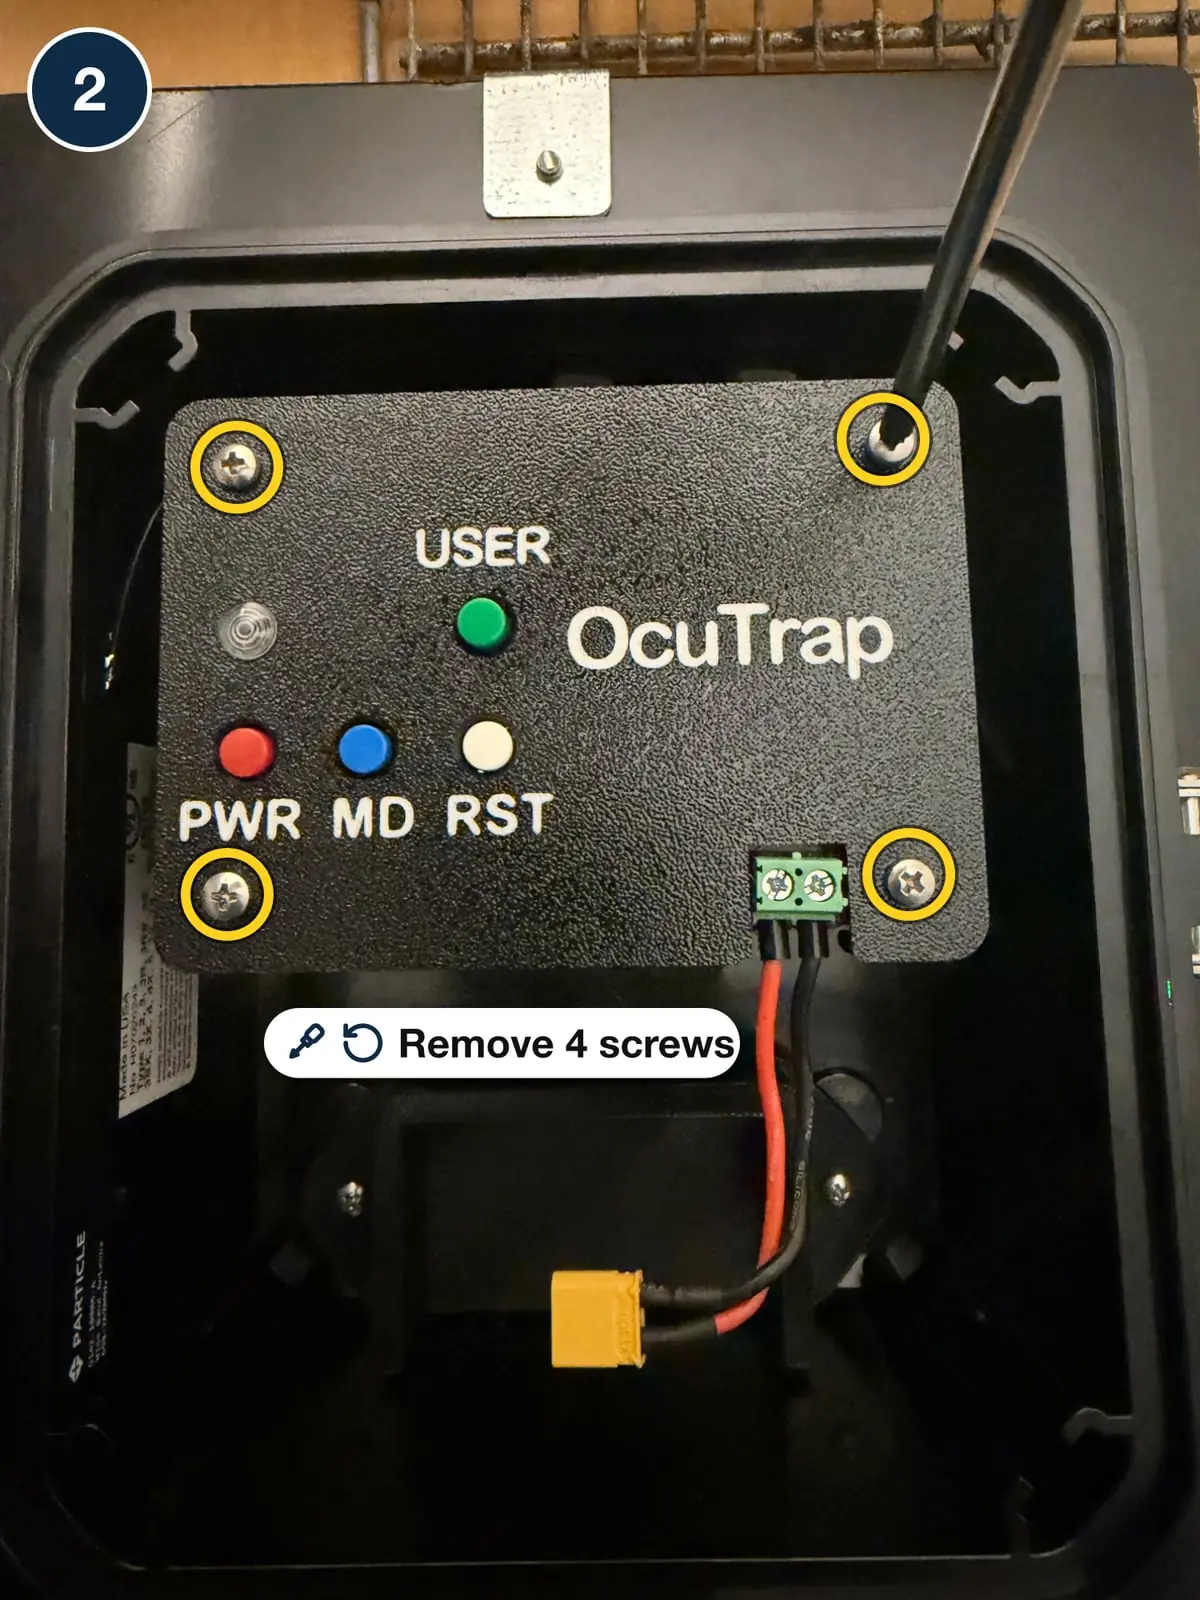
Four corner screws
3. Tilt the board out and find the motor wires
Tilt the faceplate and board forward. The two connectors are at the top: the motor port on the left and the accessory port on the right (viewed from the front). The motor port's red and black wires run down to the left terminal block.
Take a photo with your phone now, so you can check your wiring against it later.
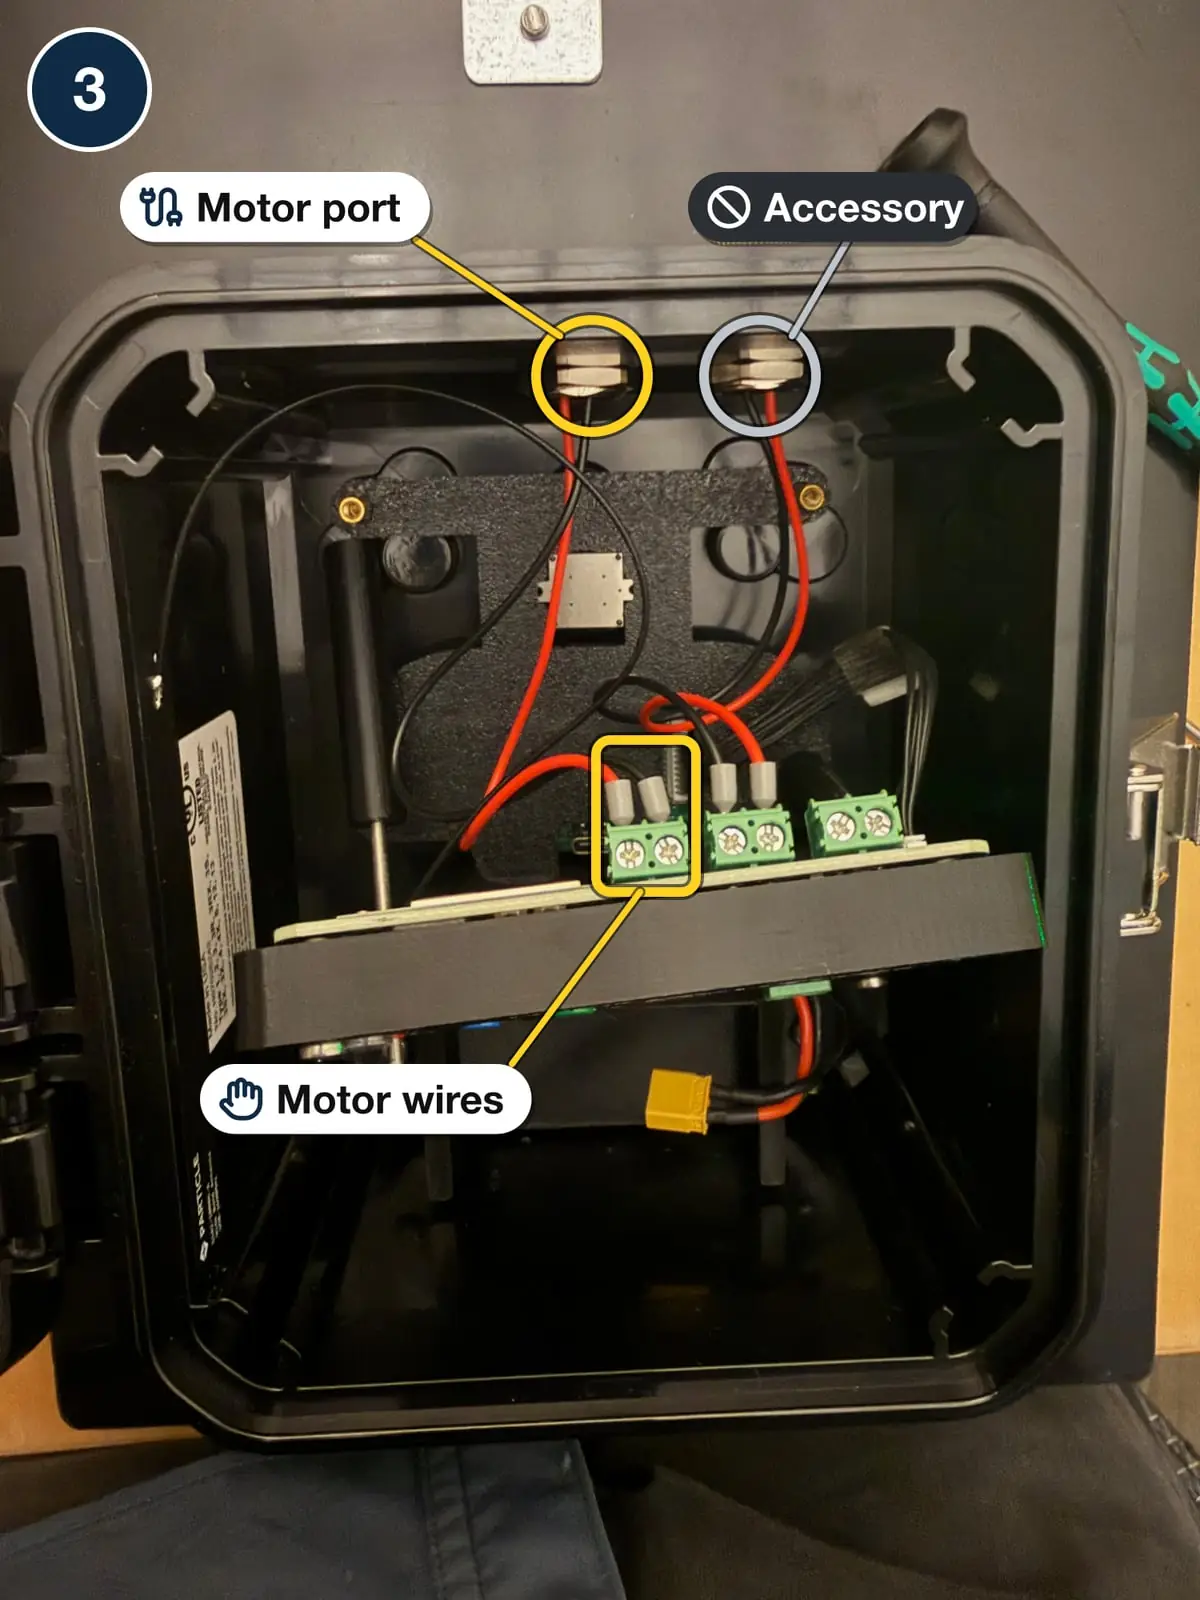
Motor port (yellow) and accessory port (grey)
4. Loosen the terminal screws
Turn both screws on the left terminal block counterclockwise a few turns. You don't need to take them out.
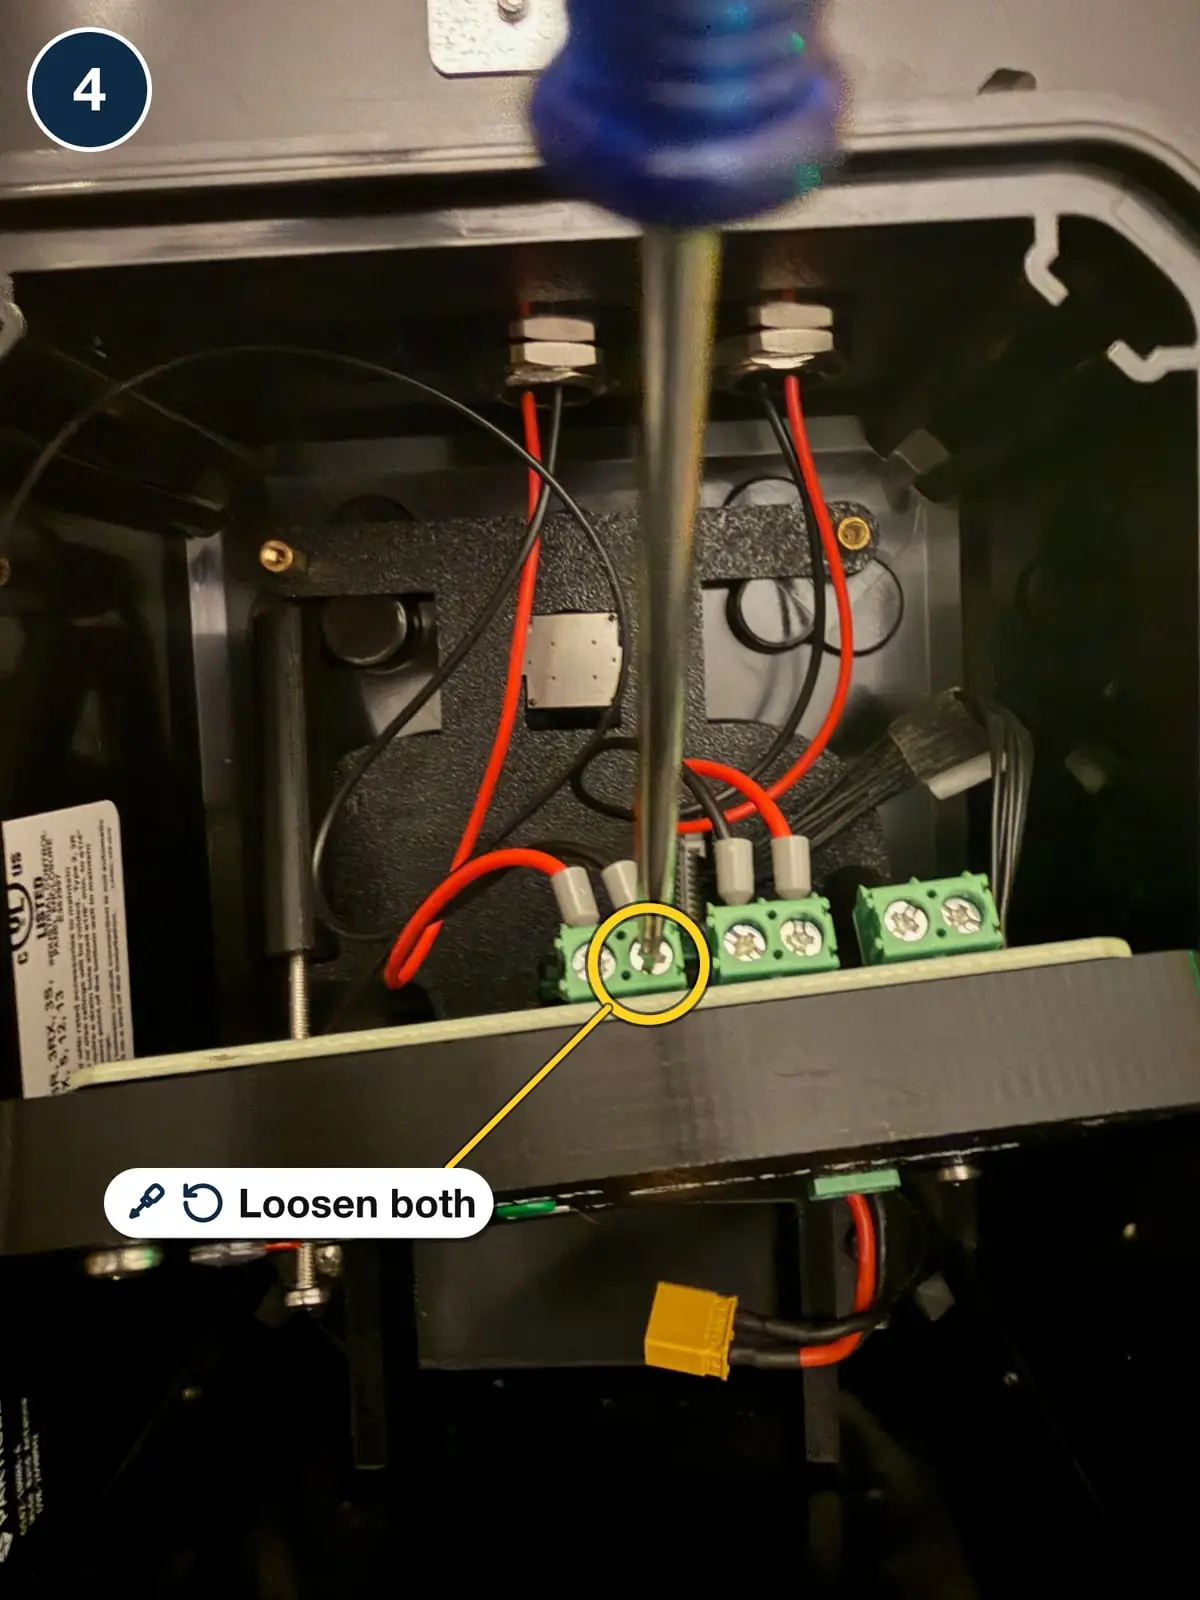
Loosen both screws on the left block
5. Pull the two wires out
Pull the red and black wires straight out of the terminal block.
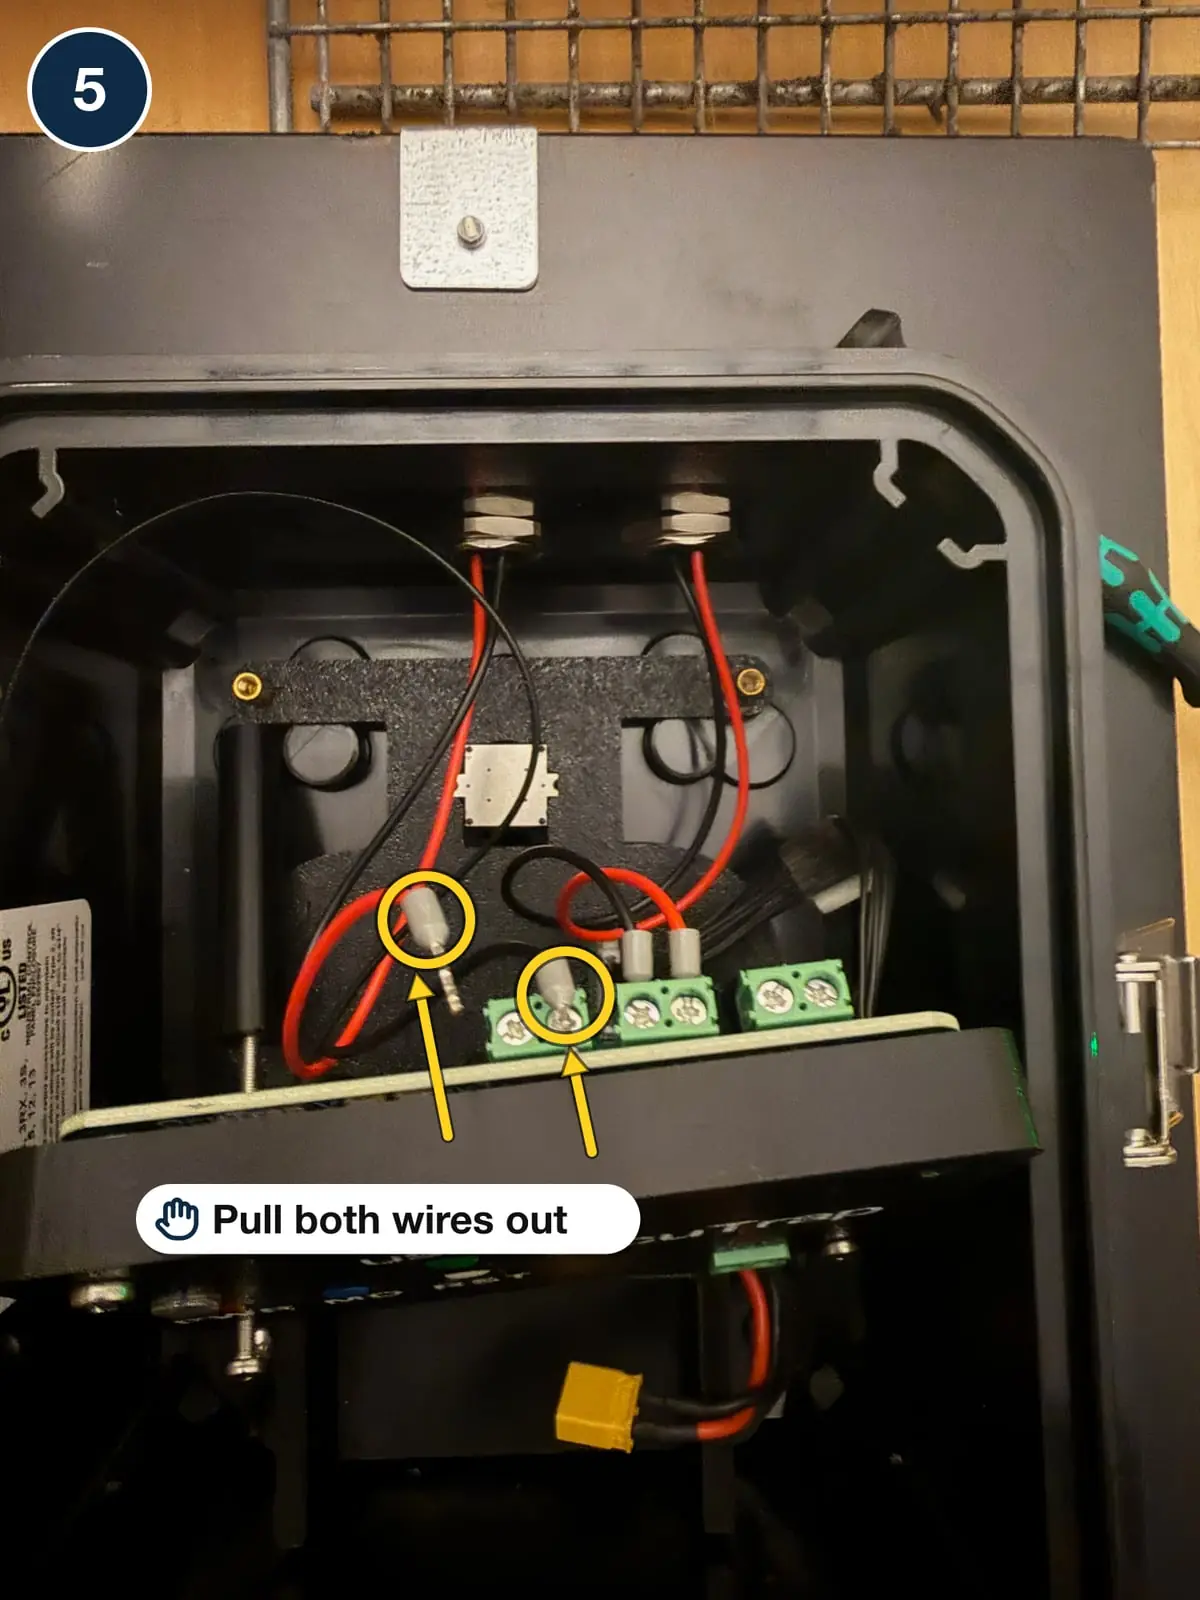
Both motor wires out
6. Loosen the inner nut
Inside the POD, fit the wrench on the motor port's nut and turn it counterclockwise until it comes off. Slide the nut off over the wires.
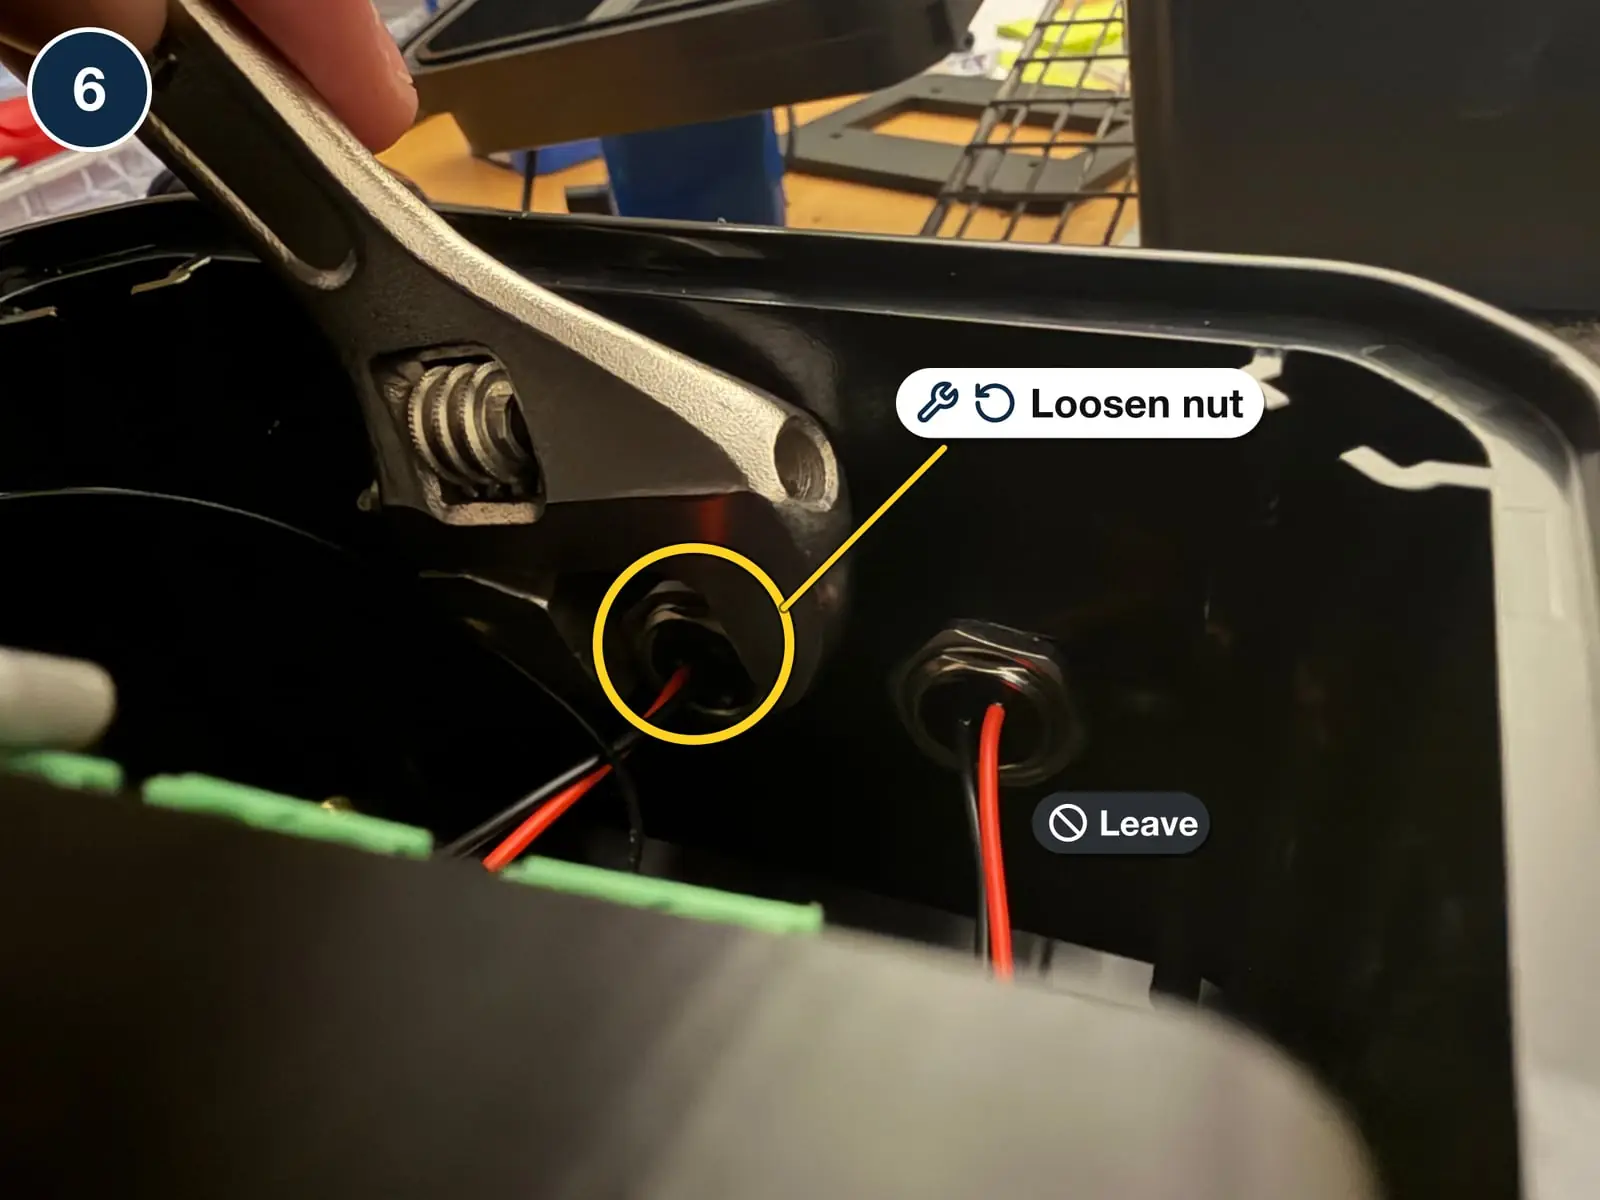
Loosen the motor port nut, not the accessory port's
7. Remove the old connector
Lift the old connector out from the top of the POD, pulling its wires up through the hole.
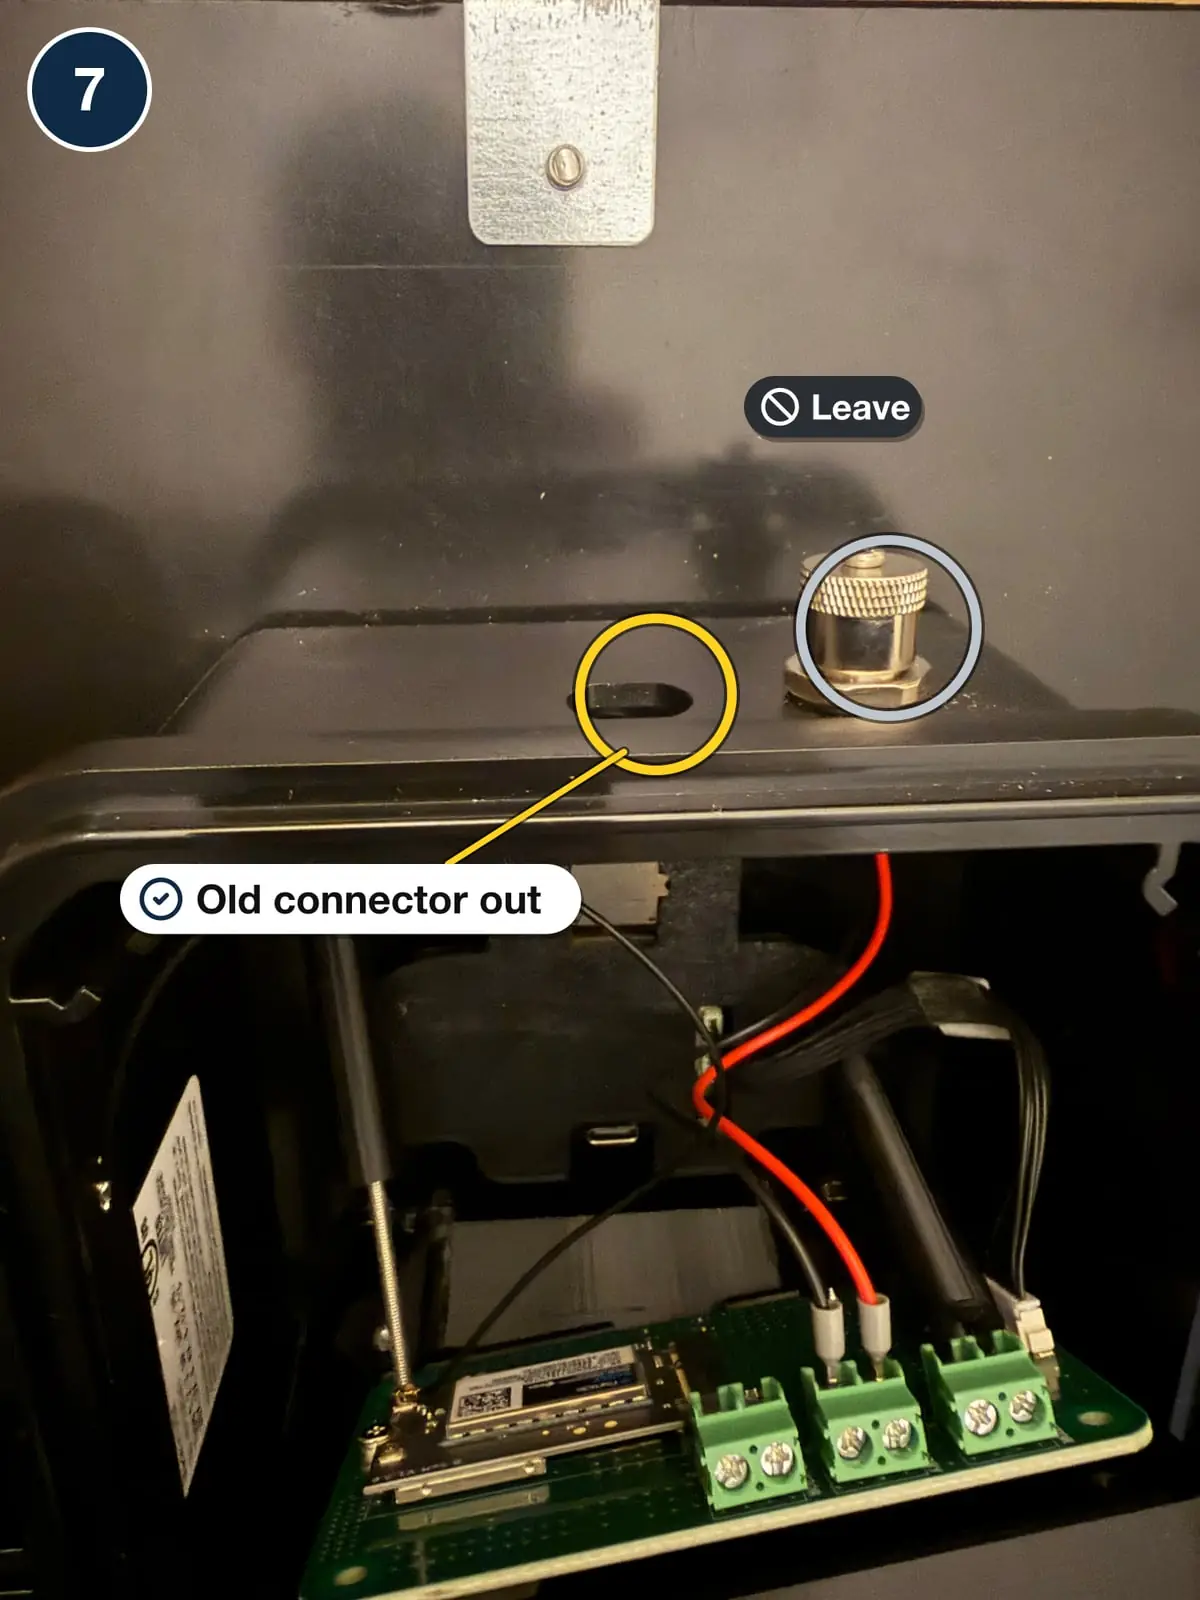
Empty motor port hole; the accessory port stays
8. Fit the new connector
- From the top, feed the new connector's wires down through the hole and seat the connector flat on the POD. Any sealing washer stays on the outside, between the connector and the POD.
- Inside, slide the nut over the wires and thread it onto the connector clockwise.
- Hold the connector straight from the outside and snug the nut with the wrench. Stop once it no longer turns in the hole. Overtightening can crack the housing.
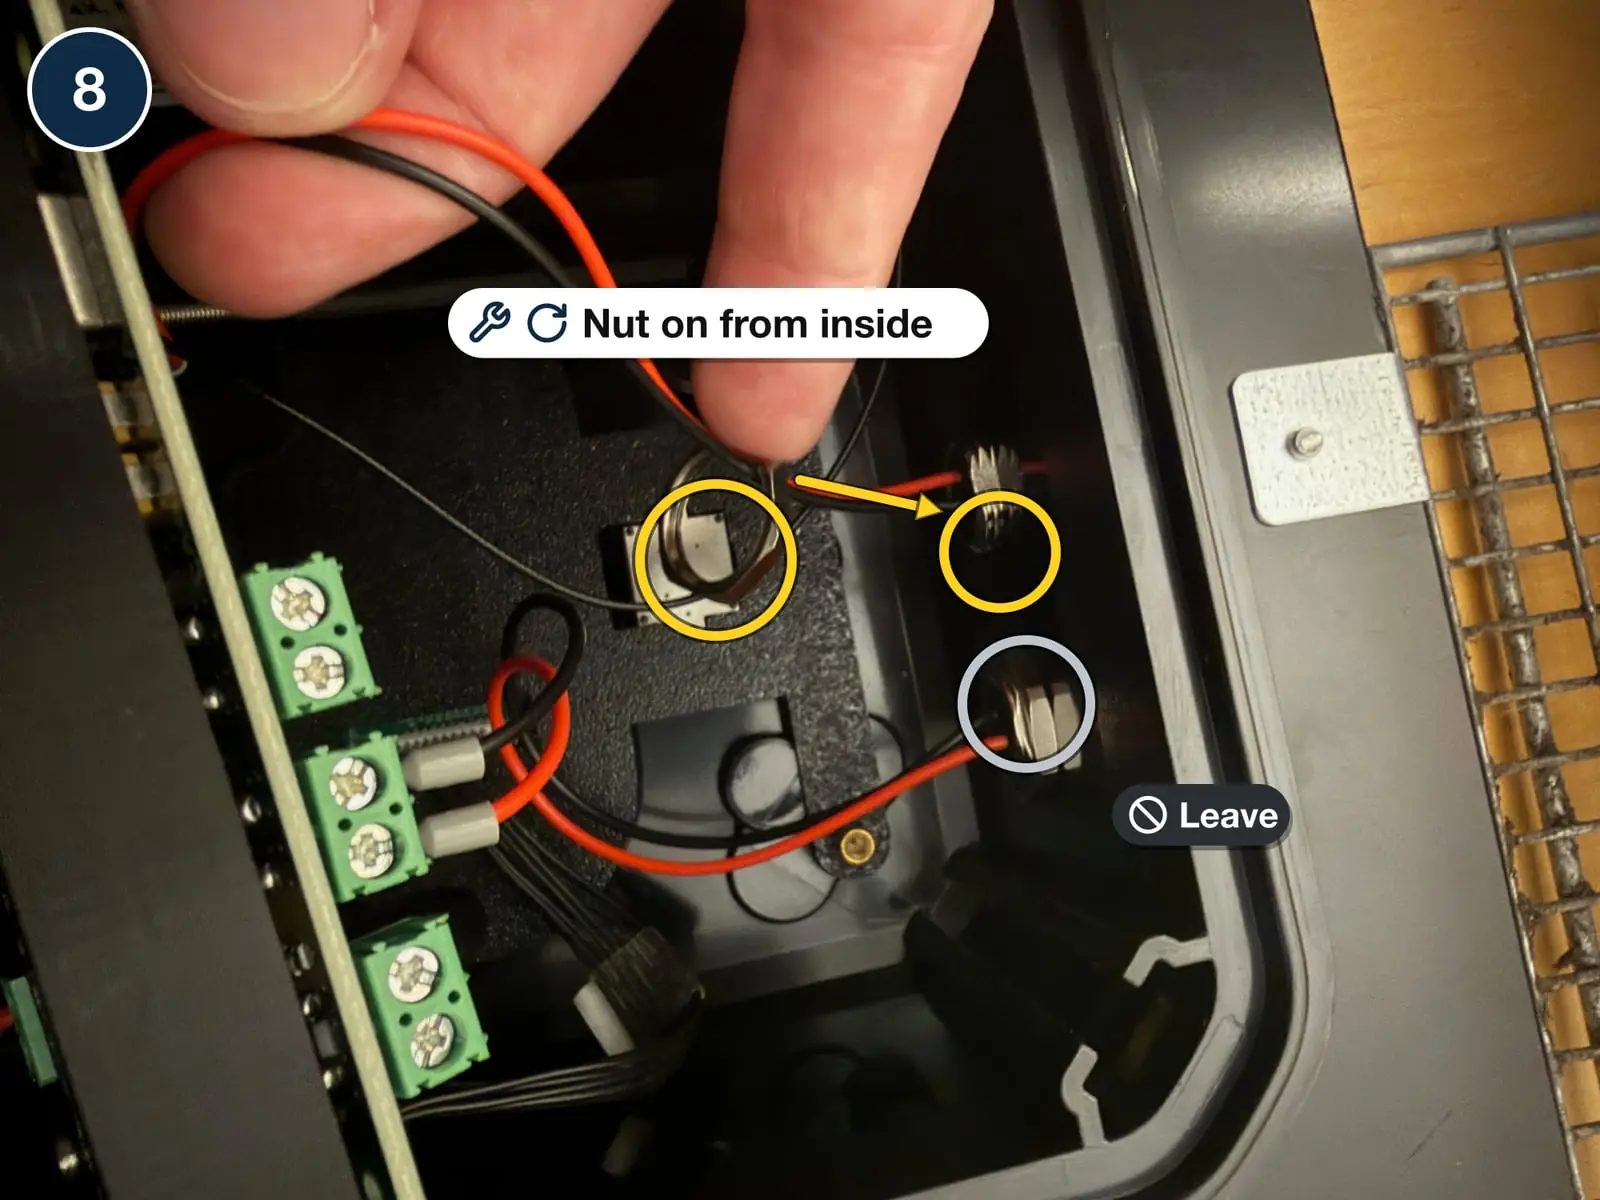
Slide the nut over the wires and thread it on from inside
9. Connect the wires: red left, black right
Push each wire end fully into the left terminal block and tighten its screw clockwise:
- Red in the left screw
- Black in the right screw
Give each wire a gentle tug. It should not move.
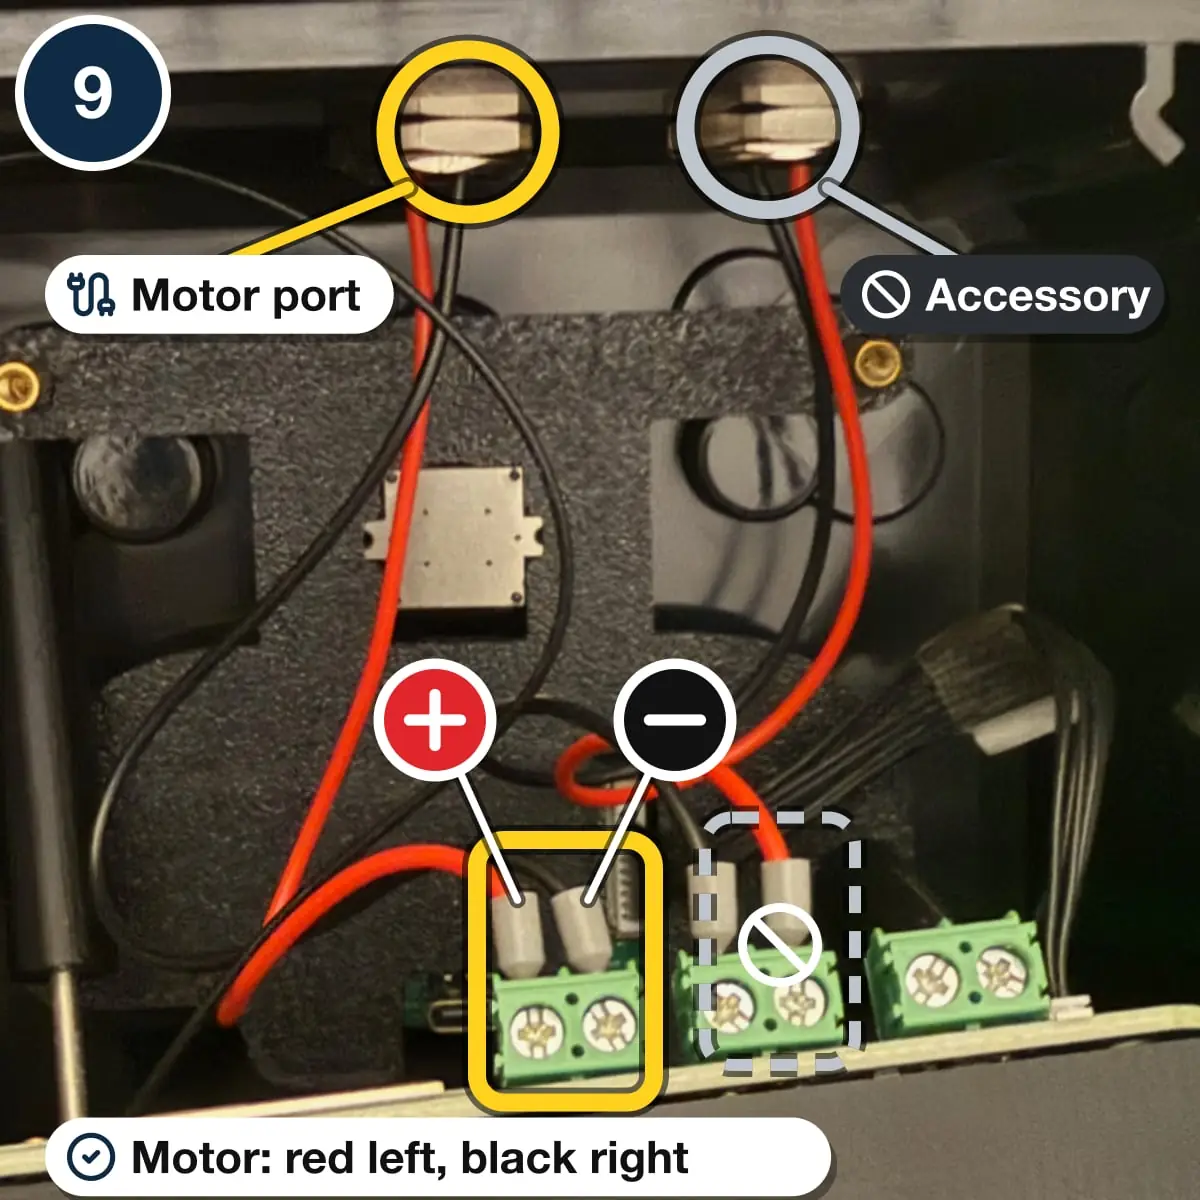
Motor block: red +, black −. Not the accessory block.
If the door moves the wrong way after the repair (it opens when you send Close), the red and black wires are swapped. Power off, unplug the battery and swap them.
10. Close up and test
- Tilt the board back and refit the faceplate with its four screws. Keep the wires clear of the screw holes.
- Plug in the yellow battery connector.
- Screw the motor cable onto the new motor port. Push the cable fully into the connector so no red or black wire shows (see Wire exposed).
- Press Power to turn the trap on.
- Keep hands clear of the door, then open and close it from the app or with the trap buttons.
- Close the POD latch fully to keep it weather-tight.
If the door still won't move, check the Motor connector tightness check and contact support with your Trap ID.